
LHD to RHD conversion
RHD CONVERSION OF A 1973 CALIFORNIAN MK III (RWA) MG MIDGET
I've read various comments about the conversion of LHD Spridgets to RHD – some people saying it is simple, with very few things to consider. Well, in my experience, there can be a whole lot of expensive things to consider – some of which are not very obvious at the outset – and I've written this note to help others who may be thinking of doing it.
I now realise that I could have left the car as LHD, as I've since seen quite a few LHD US cars registered and driven on our roads. However, I think I would have made the conversion anyway to give the best driver view of the road. I also decided to leave the side marker lamps because of the 'visibility to other drivers' factor – a pertinent consideration when you're driving a Very Small Car.
I re-used the collapsible US steering column for the safety it offers and because I wanted to re-use the US steering column stalk switches and ignition switch (as well as the beautiful Emilio Nardi steering wheel which came with the car as I didn't want to have to find a new hub for it). I bought a re-conditioned RHD steering rack.
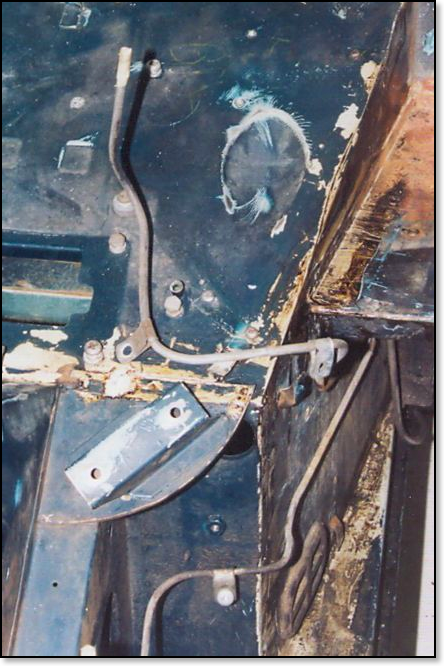
The first major job was to modify the footwell on the RHS to take the US steering column, as the body had just the plain hole for the non-collapsible column to go through. I made a cardboard mock-up (mirror version) of the part of the firewall that the US column is bolted to half-way along its length. That took a bit of measuring and quite a few drawings to get all the angles correct so that the bracket would be properly aligned. This was then made up in steel, and the appropriate bit of the RHS firewall cut out and the new bracket welded in. A hole was cut out on the top of the footwell and a tapered, curved piece welded in to give top clearance for the larger-diameter US column.
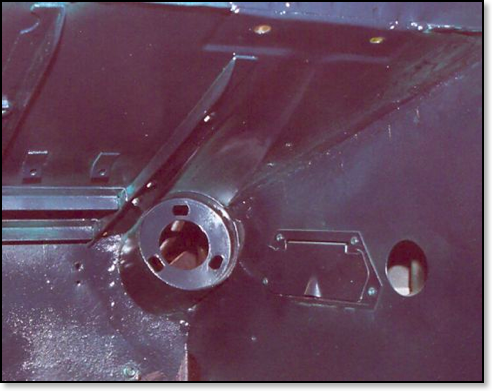
This necessitated altering the shape of the accelerator pedal linkage, and relocating the starter solenoid. Careful cutting allowed the coil mounting to stay where it was. As the pedals and brake and clutch master cylinders had to be moved across, some hydraulic pipe cutting and bending was needed. The brackets holding the top end of the steering column required holes to be drilled in the scuttle, and some ingenuity with stretched string was needed to get the column correctly lined up.
I intended to re-use the US instruments, switches and wiring loom, so that I could have all the accessories like seat-belt warning lamp, brake failure test lamp and warning light, anti-theft warning buzzer, side flashers and so on that were on the US cars.
The second major job was the dashboard. I tried to re-use the US dash by cutting off the instrument panel end and welding it to a shaped panel in a 'mirror' version of the original (having first made a cardboard mock-up). I removed all the cracked plastic coating and foam padding, and covered the 'new' dash in black vinyl (unpadded). It looked really good. However, I hadn't really thought about what would be behind it and where, and found there was much fouling of instruments, switches and wiring. In hindsight, the main culprits were the windscreen demister nozzles and hoses and I could have left them out entirely without any loss of functionality, and used the re-built US dash. I think this would have given the best end-result.
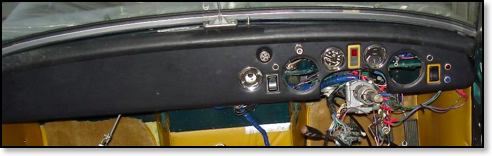
Anyway, I decided to use a RHD Mk III dashboard, but this had its own problems. The RHS and LHS dashes are fixed quite differently – the flange across the top of the RHD dash points to the rear, whereas that on the LHD dash points forward, so I had to have some brackets welded on to the scuttle to accommodate the new fixings. I was able to re-use the US padded 'crash rail' without problems. I had to weld two doughnut-shaped discs into the speedo and tacho holes to accommodate the smaller US instruments, and make a hole in the dash on the left of the instruments for the heater control. I also had to buy a longer choke cable.
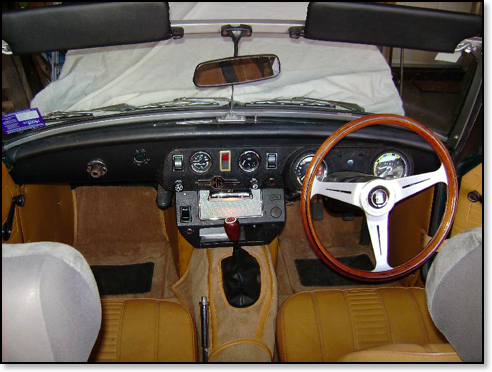
Some of the dashboard had to be cut away to make room for the steering column switch cowl (some of the cowl had to be cut away, too). This is rather less than satisfactory, but I couldn't think of any way to do it other than build a new dashboard from scratch. However, if you don't look too closely, it's not very noticeable. Getting the key in and out of the ignition switch is a bit awkward.
I managed to work out the wiring loom by making diagrammatic sketches of each of the main sub-systems. This helped greatly in making the necessary cuts and 'pastes'. I used crimping connectors throughout, and have had no problems. However, because I had to fit new seat belts, the seat belt warning lamp wiring could not be connected. Also, as an essential bit of the anti-theft warning buzzer switch was missing from the ignition switch assembly, it turned out that those sub-systems are unusable. I left the 3-wiper windscreen system in place as there was no need to change it.
Lastly, new RHS headlamps were bought and fitted and the front turn indicators modified. The US cars had a dual-filament globe for the parking and indicator lights in a yellow plastic-covered fitting. This is not allowable here, so I had to change the wiring and find second-hand Toyota headlight plugs to put the parking lights into the headlamps.
An Engineer's Certificate was required in order to register the car. I thought this was because the body structure had been modified for the fitting of the US steering column, and that welds would have to be checked for adequacy, and so on. Silly me – they didn't even look at that aspect of the car, but spent all their time checking that it complied with the Australian Design Rules for 1973!! There were no problems with that, thank goodness.
I've learnt a lot from this experience and, if I were to do it again, I wouldn't have tried for any sort of authenticity. I'd have been much better off to have known a lot more about the differences between RHD and LHD Spridgets, and I'd have been better to give much more thought, and talked to people in the know, about what sort of car I wanted to finish up with. With all the alterations needed to convert it to RHD it is no longer an 'original' car, so will never bring the price associated with that state, and no-one will ever want to convert it back to its original condition.
When I first thought of getting a 'fun' car, I looked at clubman-type cars that were being made locally by Elfin and Amaroo, but couldn't afford them. The Midget has cost me three or four times its probable market value – far more than I ever imagined (the price of experience?) – and I think I'd have been better to buy a running, registered Spridget and work on it as necessary along the way. My task would also have been easier and cheaper if I'd decided to re-build the car to a more basic state, with a re-paint in a brighter colour, no bumpers, and a bit of engine upgrading, including electronic ignition.
That doesn't mean we're not pleased with the car we have. It's surprisingly comfortable, drives really well (with no rattles), and is a lot of fun to whiz around winding roads in on sunny days and pretend to be 18 again. As 'Rocky' and 'Madge' (see “As Time Goes By” TV series), Marg and I enjoy seeing our kids' eyebrows go up and the big grins on our grandkids' faces when we burble into their driveways.
Don Jordan.
5th May 2009.
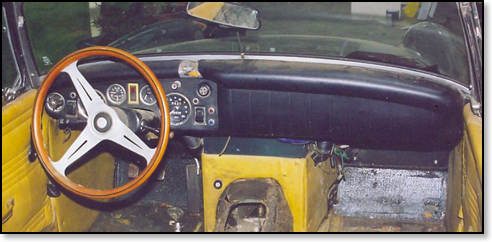
US dashboard
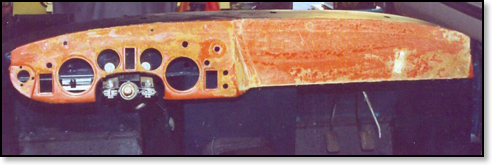
US dash stripped of vinyl and foam
US dash rebuilt for RHD
Modified RHD dash
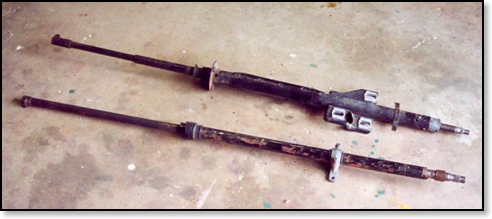
LHD and RHD steering columns
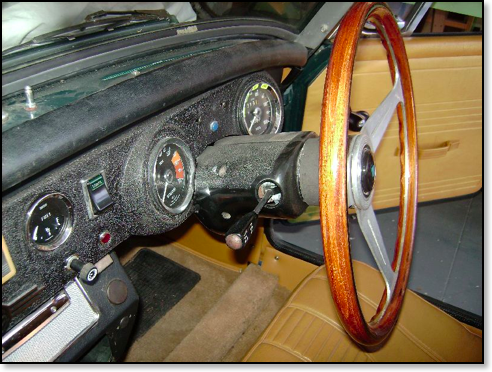
Steering column cowl
Firewall on LHS
Footwell on LHS

Accelerator linkage and steering column fixing in footwell
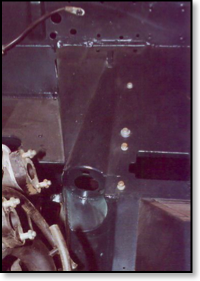
Firewall on RHS before conversion
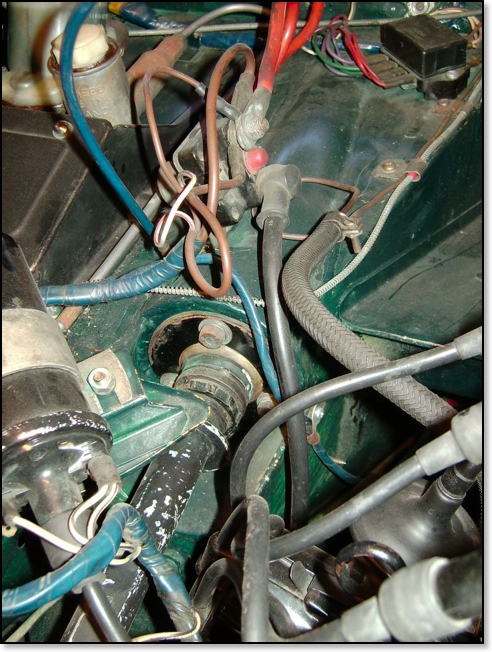
Steering column fixing and solenoid mounting